Sandbox quickstart
Start exploring the Sandbox—fast. 🔥
The first three steps might feel familiar; they're the same in the step-by-step guide to explore Swan.
Step 1: Get access to Swan
Accessing Swan begins on the Swan website.
You'll provide some basic information and then, on a second screen, your mobile phone number. Your mobile phone number is required to gain access to Swan, even if you're just exploring—it's how you'll log in and consent to sensitive operations.
In this quickstart guide, you'll take the quickest path to action. You do have other options that allow for more customization and control over the user experience.
Step 2: Connect with your mobile device
Swan authenticates you, a physical person, to the Swan system with your mobile device and phone number. Developers and end users follow the same process, so everyone logging into Swan must use their mobile device.
Connecting with your device logs you into the Swan Dashboard, the command center for your integration.
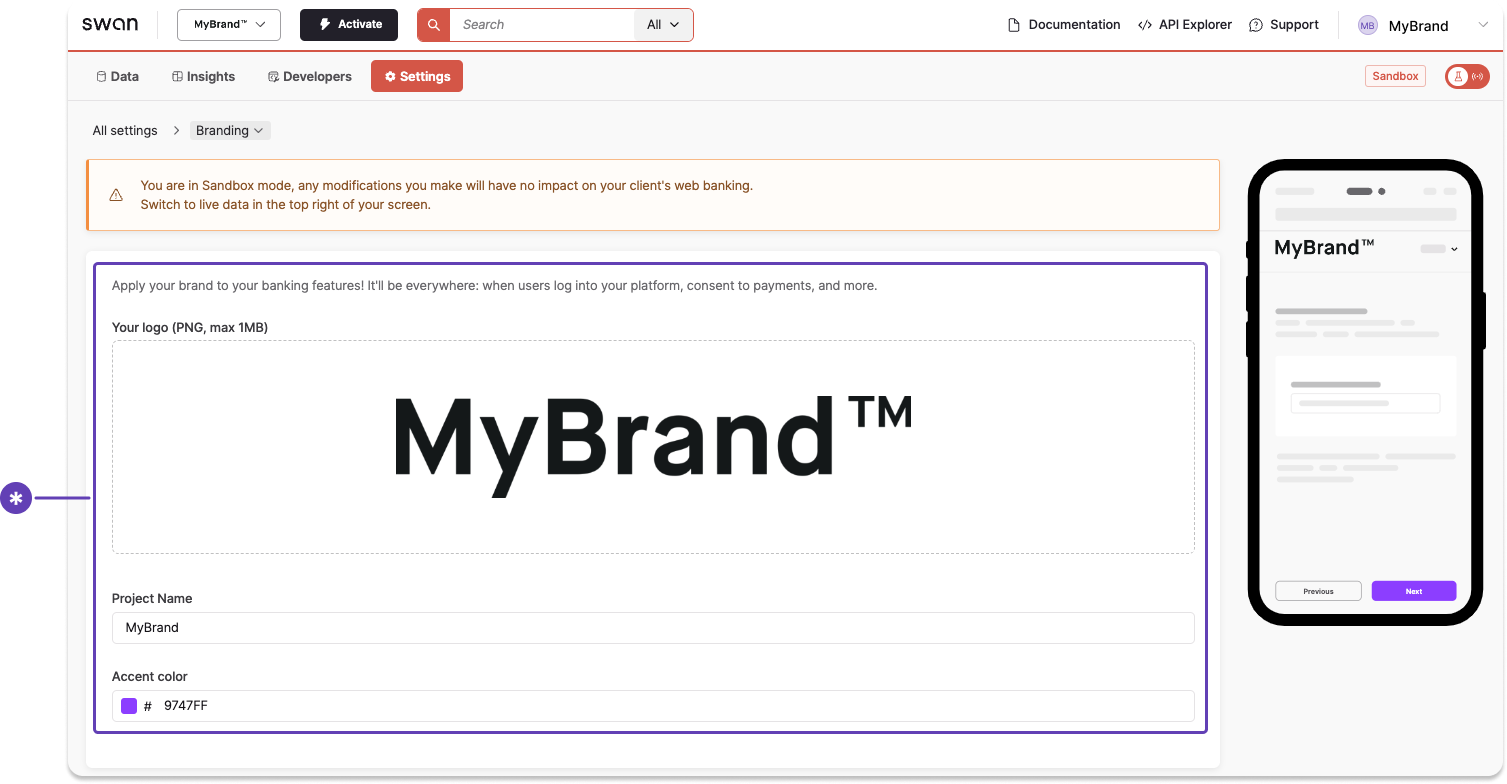
Step 3: Create your project
Build a test banking experience that matches your brand. Open Dashboard > Settings > Branding to name your project, upload your logo, and choose an accent color.
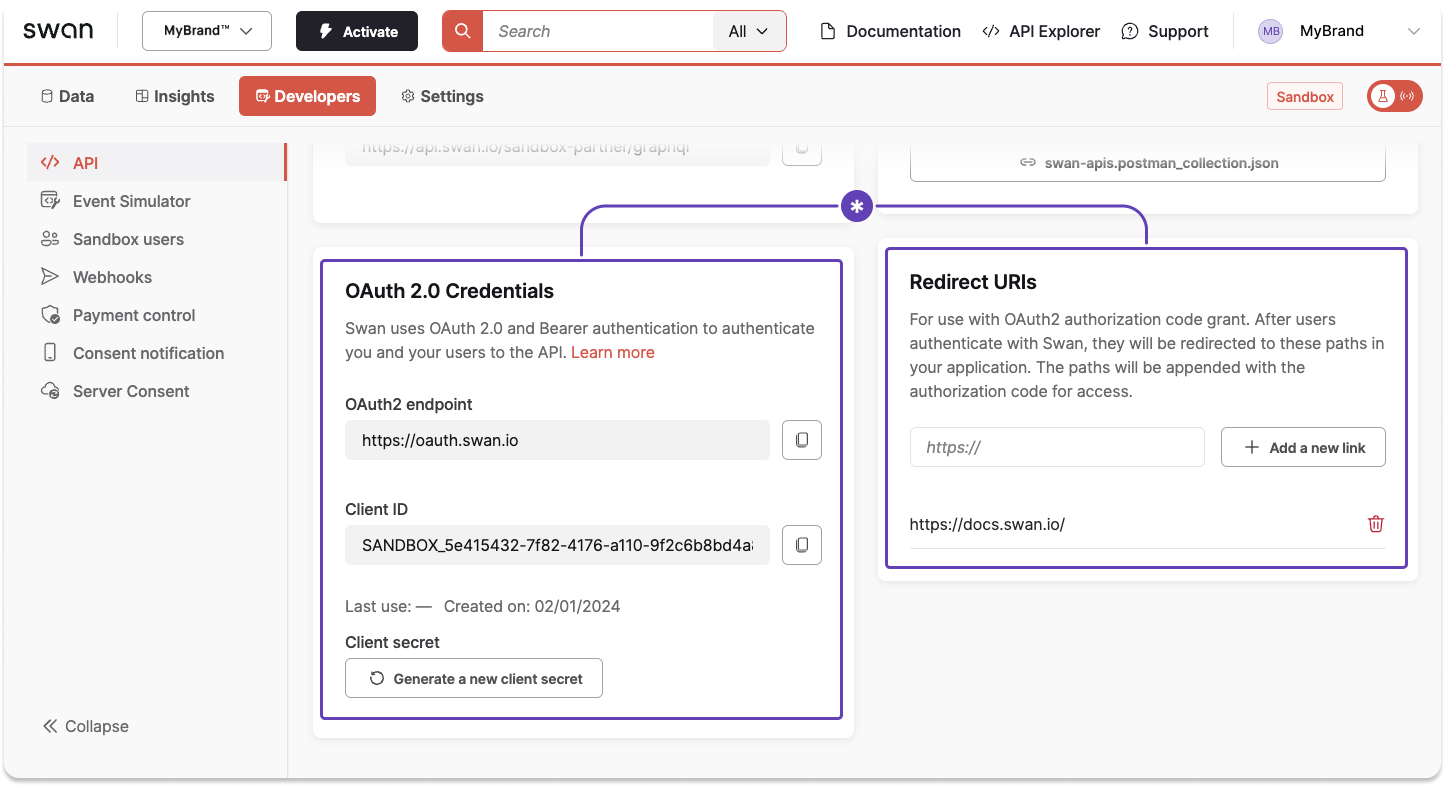
Step 4: Get set up for the API
Go to Dashboard > Developers > API to get your OAuth 2.0 credentials and add your redirect URIs.
Step 5: Add your first account
- Create an onboarding link to onboard an individual or company account holder.
- Log into Swan's provided Web Banking app. Get the link from your Dashboard > Settings > Web Banking, in the section titled URLs.
Step 6: Validate your account
- Complete identification.
- Verify the account holder.
- Submit supporting documents if required.
Step 7: Execute your first payment
- Credit your account. In the Sandbox, you'll do this with fake money through the Event Simulator.
- Follow the example on the simulator page to receive an incoming transfer to add fake money to your new Swan account.
- Use your new fake funds to initiate a SEPA Credit Transfer.
- Use the Event Simulator to book the transfer. Go to Dashboard > Developers > Event Simulator, choose book an outgoing transfer, and enter the required information.
- The world of Swan is now your oyster.
- Explore the documentation to see all Swan offers.
- Discover more in the Event Simulator and the API Explorer.
- If you're not in communication with Swan (yet), feel free to submit this form for more information.
- If you already have dedicated Account Managers, please contact them with any questions.
Happy building!