Create an individual onboarding link
There are two methods you can use to create individual onboarding links.
- Run an API mutation to create a unique onboarding link for each future individual account holder.
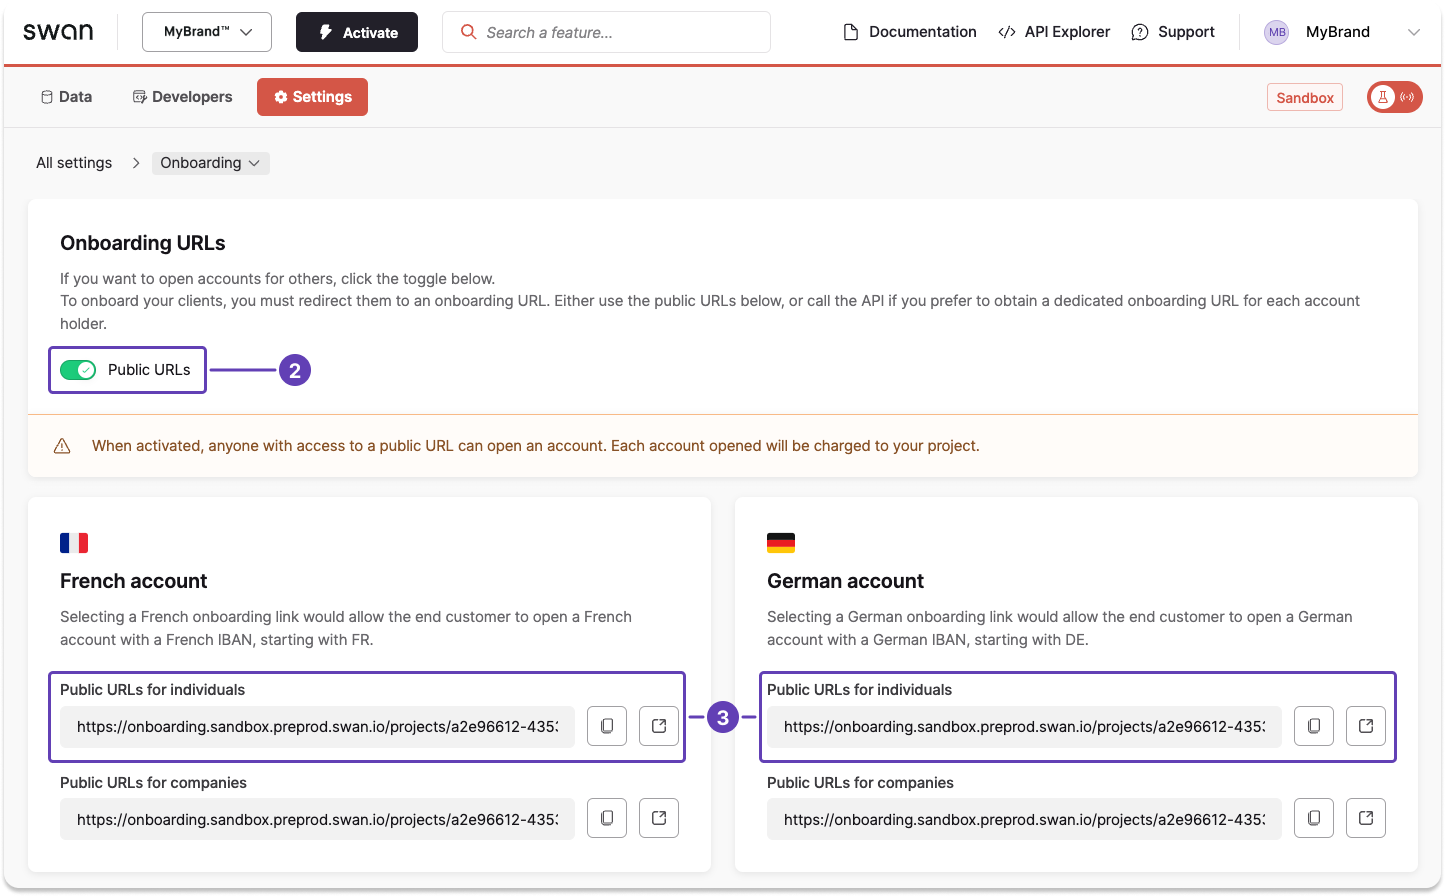
- Use a public URL from your Dashboard to share the same individual onboarding link with all of your users.
Use public links with caution. Those with fraudulent intent can use these public links to complete multiple onboardings, and if this happens undetected, they'll have multiple accounts in your project.
Unique links using the API
Create a unique individual onboarding link for each user with the API.
- Call the
onboardIndividualAccountHoldermutation. - Enter information for all required API fields for the account country, as noted in country requirements for individual accounts.
- Include optional fields as needed for your use case (such as
accountNameorredirectUrl). - Add optional messages to the success payload, either for validation or in case of rejection.
Mutation
Open in API Explorermutation CreateIndividualOnboarding {
onboardIndividualAccountHolder(
input: {
accountCountry: FRA
email: "malika.ngomao@mybrand.io"
employmentStatus: Employee
language: "fr"
monthlyIncome: Between3000And4500
residencyAddress: {
addressLine1: "123 avenue de Paris"
city: "Paris"
country: "FRA"
postalCode: "75000"
}
}
) {
... on OnboardIndividualAccountHolderSuccessPayload {
__typename
onboarding {
id
statusInfo {
status
}
}
}
... on ForbiddenRejection {
__typename
message
}
... on ValidationRejection {
__typename
message
}
}
}
Payload
If you added validation or rejection messages, you'll see information such as the onboardingId as well as the current status Ongoing (Valid) in the success payload.
{
  "data": {
    "onboardIndividualAccountHolder": {
      "__typename": "OnboardIndividualAccountHolderSuccessPayload",
      "onboarding": {
        "id": "ae06faf6-13b2-4e9e-891b-e78ecd5ca0e4",
        "onboardingState": "Ongoing",
        "statusInfo": {
          "status": "Valid"
        }
      }
    }
  }
}
Public link using the Dashboard
- On your Swan Dashboard, go to Settings > Onboarding.
- In the onboarding URLs section, toggle Public URLs to on.
- Notice the URLs that appear for individuals and companies for each account country.
Anyone could create an account using the public URL, and all accounts created are charged to your project.
