Configure standard cards
Standard designs are used everywhere, such as in-app, in digital Wallets, and when revealing a card's sensitive information, for virtual, physical, and digital cards.
Before creating cards, personalize the standard card design. You can use Swan's card design studio to get a 3D preview of how your card will look.
You can customize your packaging for standard cards.
Create a standard card
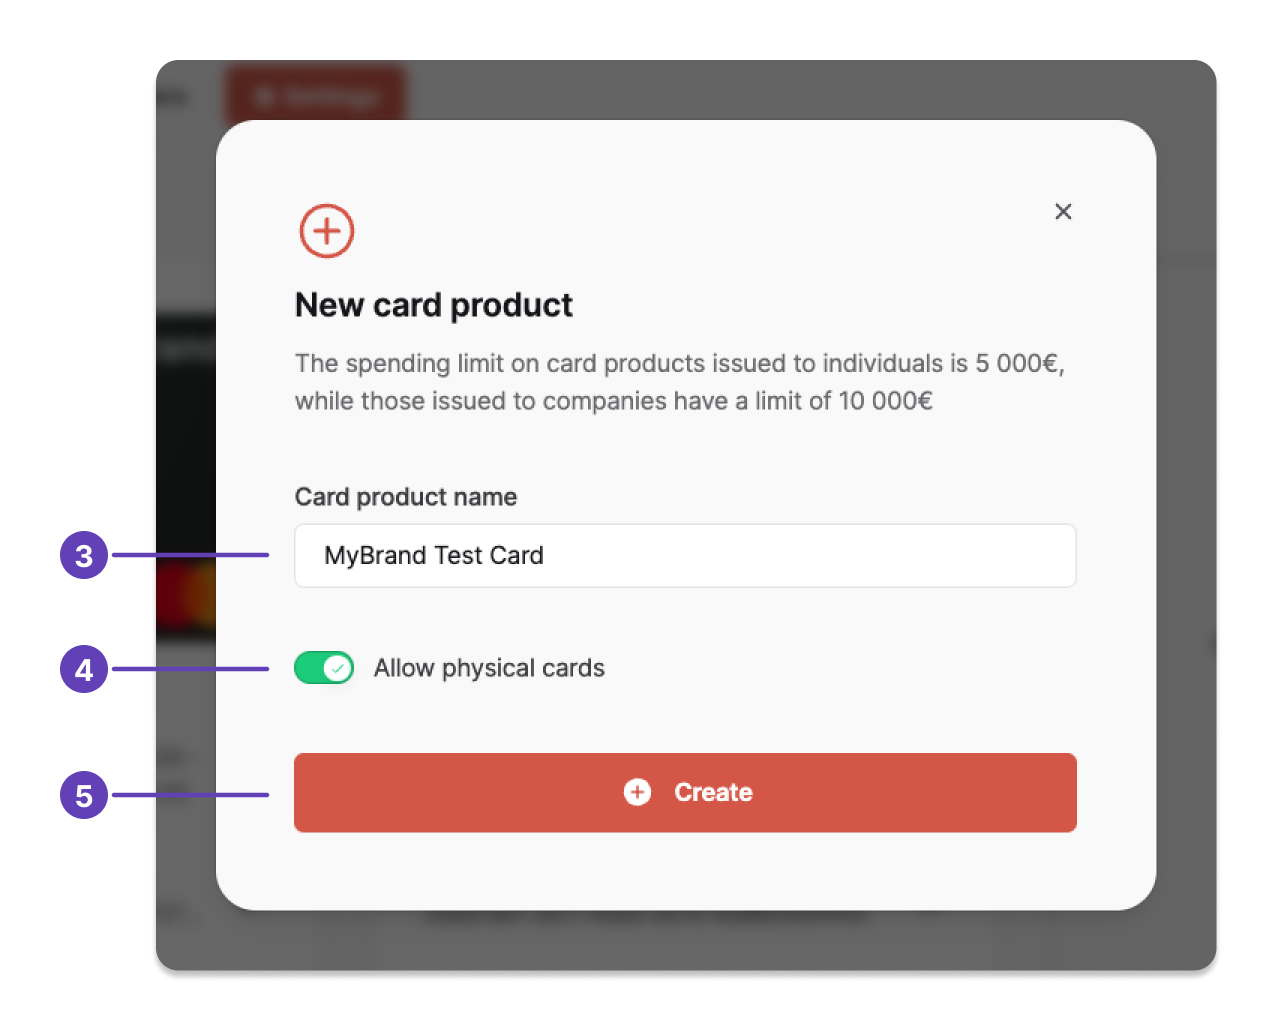
- Go to Dashboard > Settings > Cards.
- Click Create a new card product.
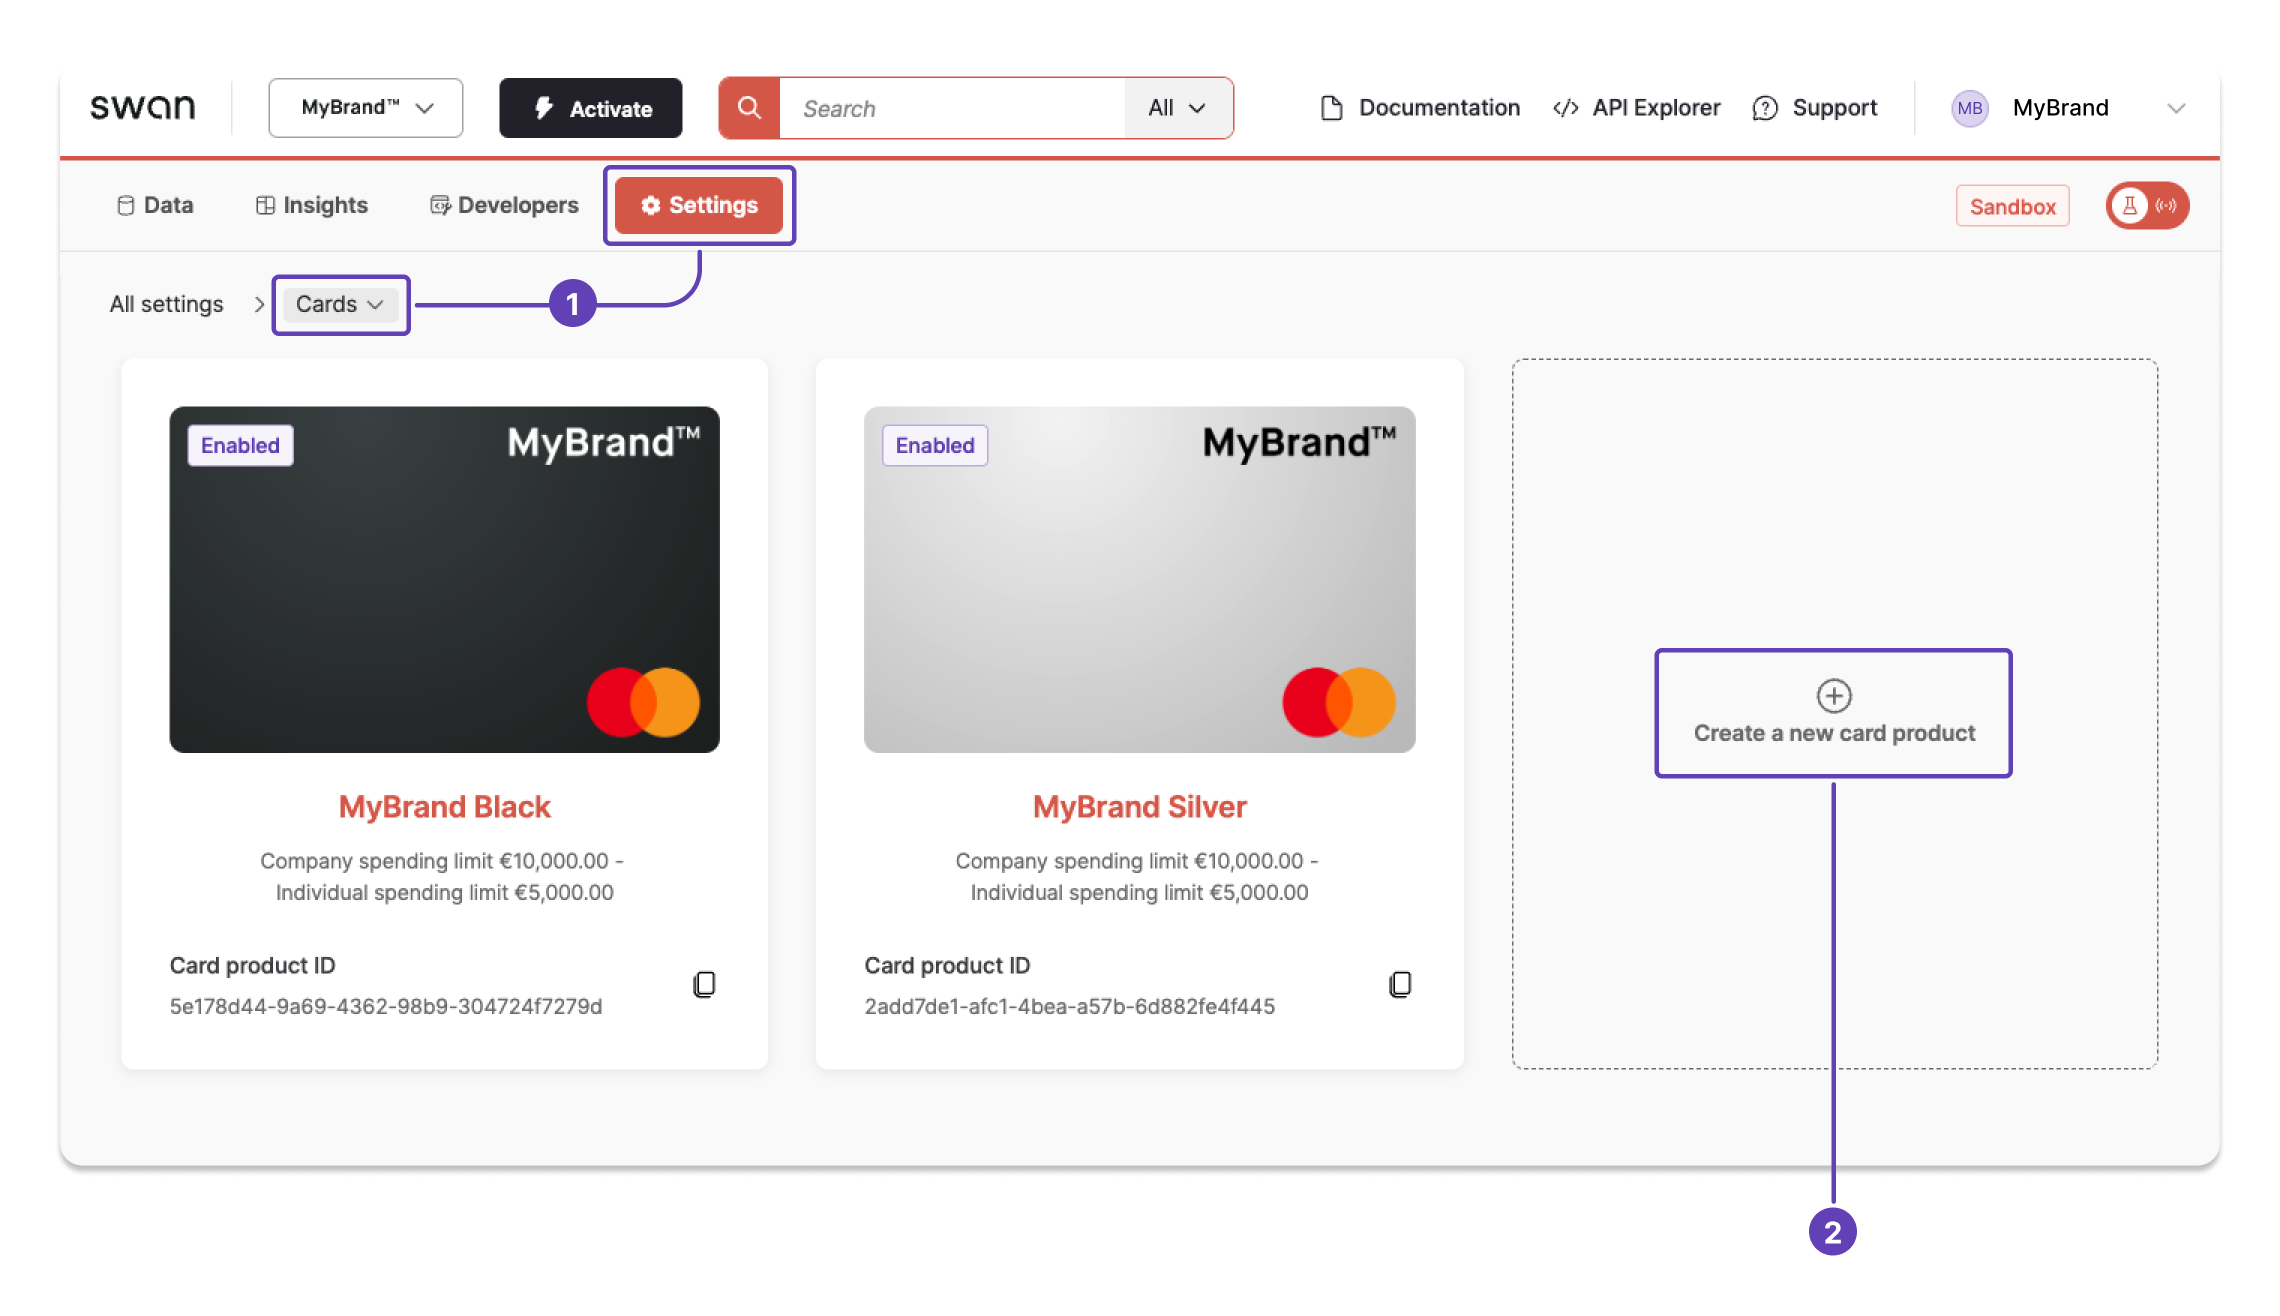
- Name your new card product.
- If you'd like to allow physical cards, toggle Allow physical cards to on.
- Click Create.
Configure your standard card
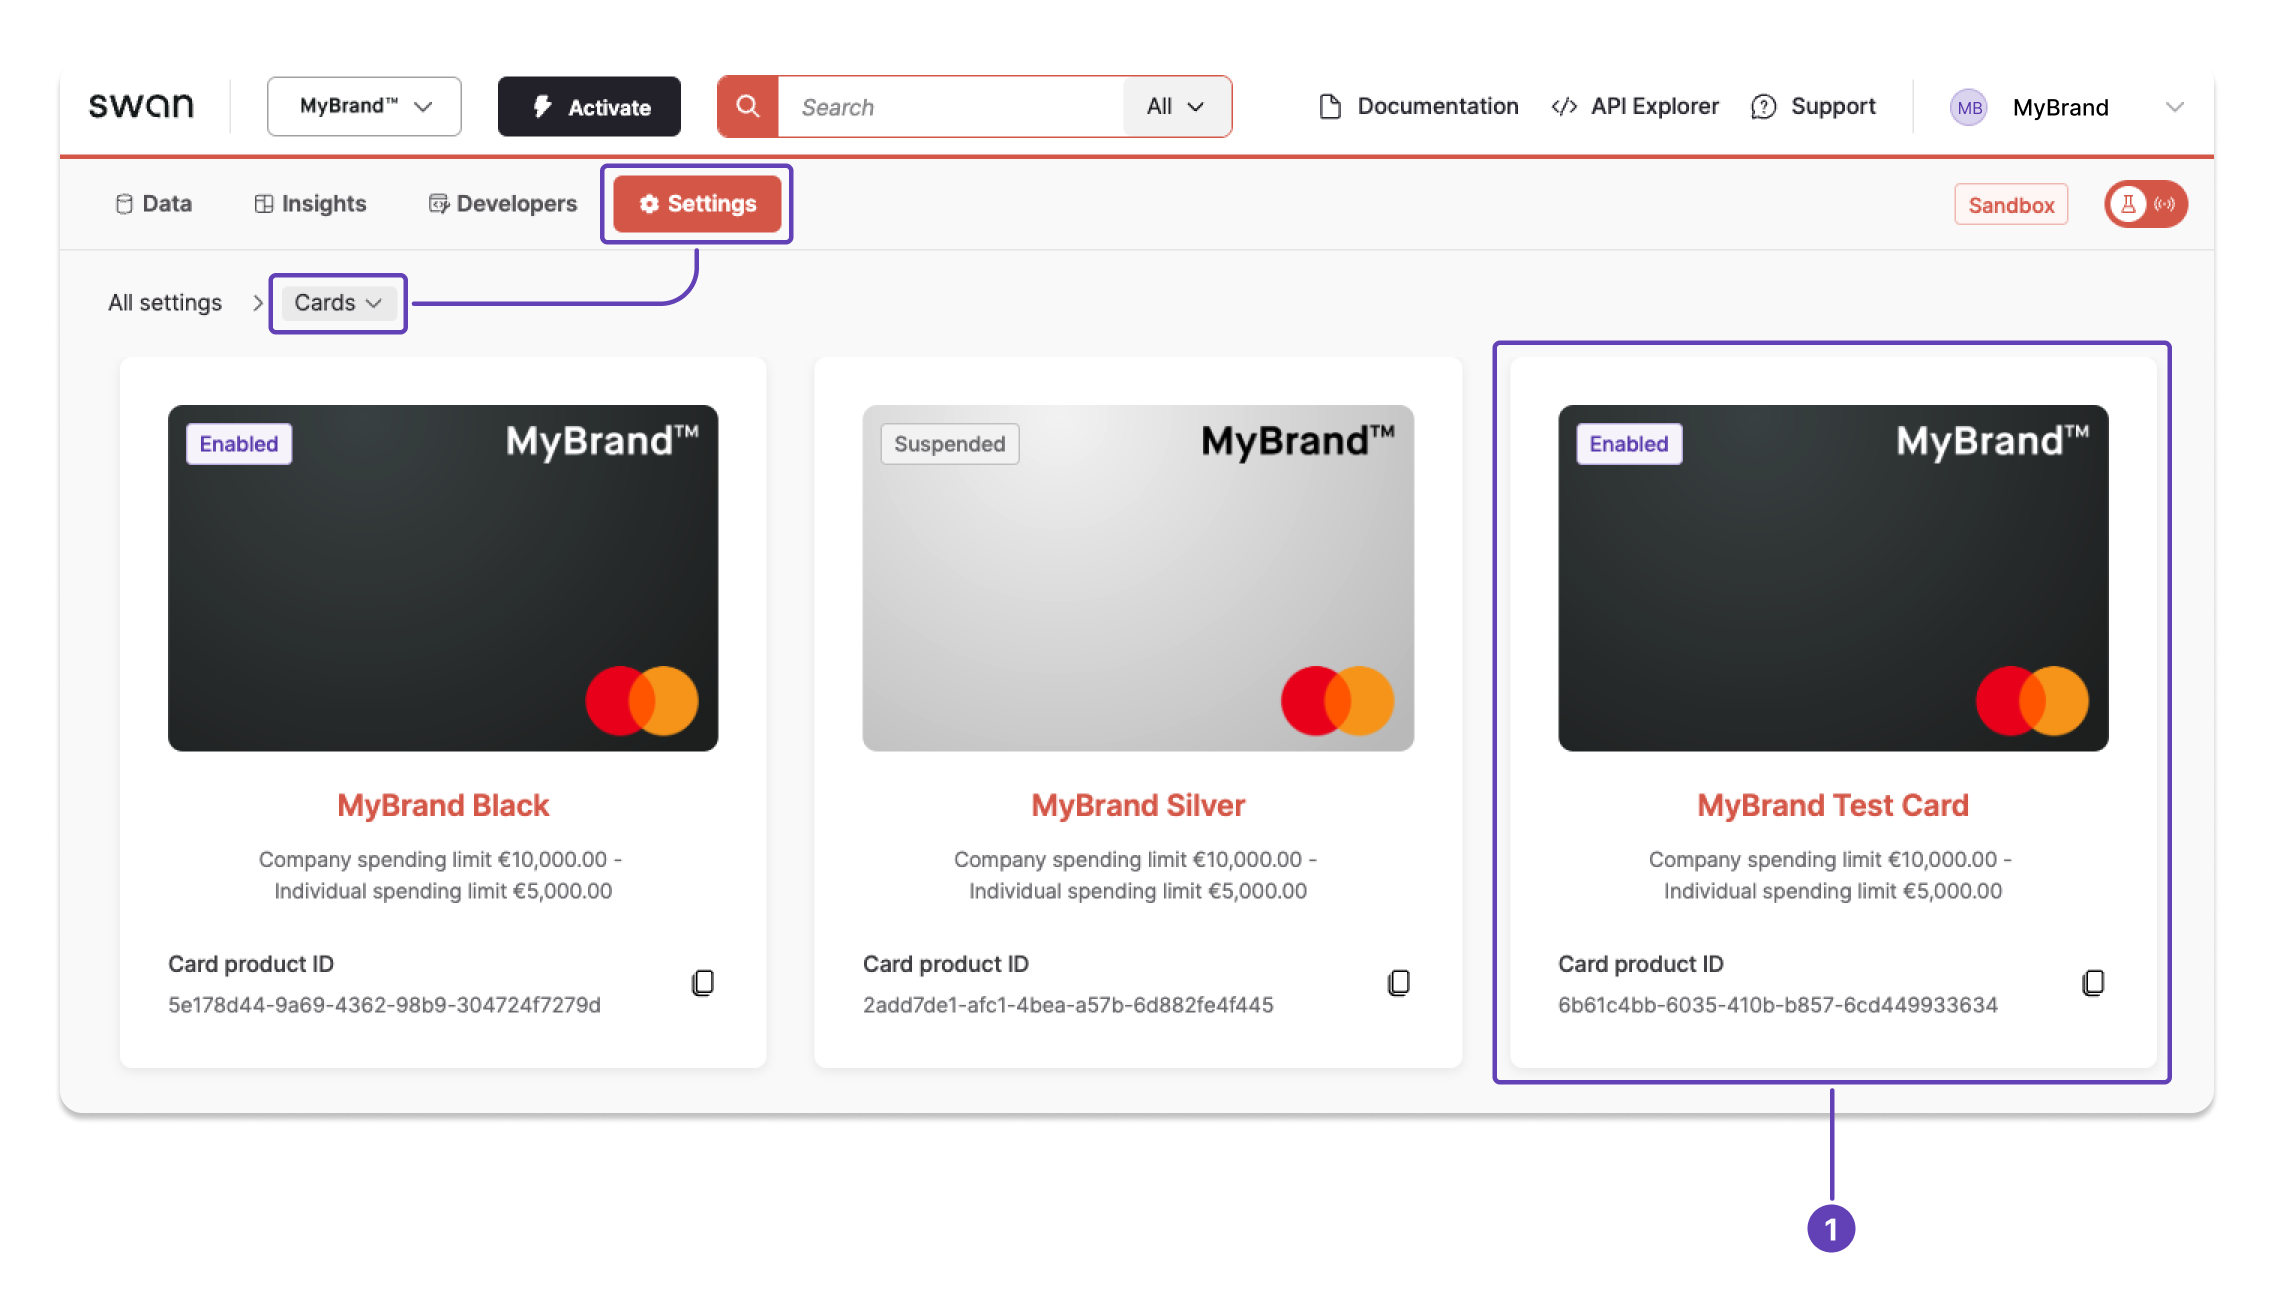
- Open the card product you'd like to configure. Remember to start on Dashboard > Settings > Cards.
- Choose black or silver. If you'd like to design a custom card, refer to the dedicated guide.
- Choose your logo size.
- Upload your logo, resizing if needed. Don't hesitate to refer to the next section for more information about logos.
- Click Save.
Note that you can also preview your card in 3D from this page.
After clicking Save, your updates are available immediately in Sandbox. However, Swan needs to review changes to Live cards. If you didn't upload a new logo, please upload your logo again and click Save, which forces the API to trigger a review.
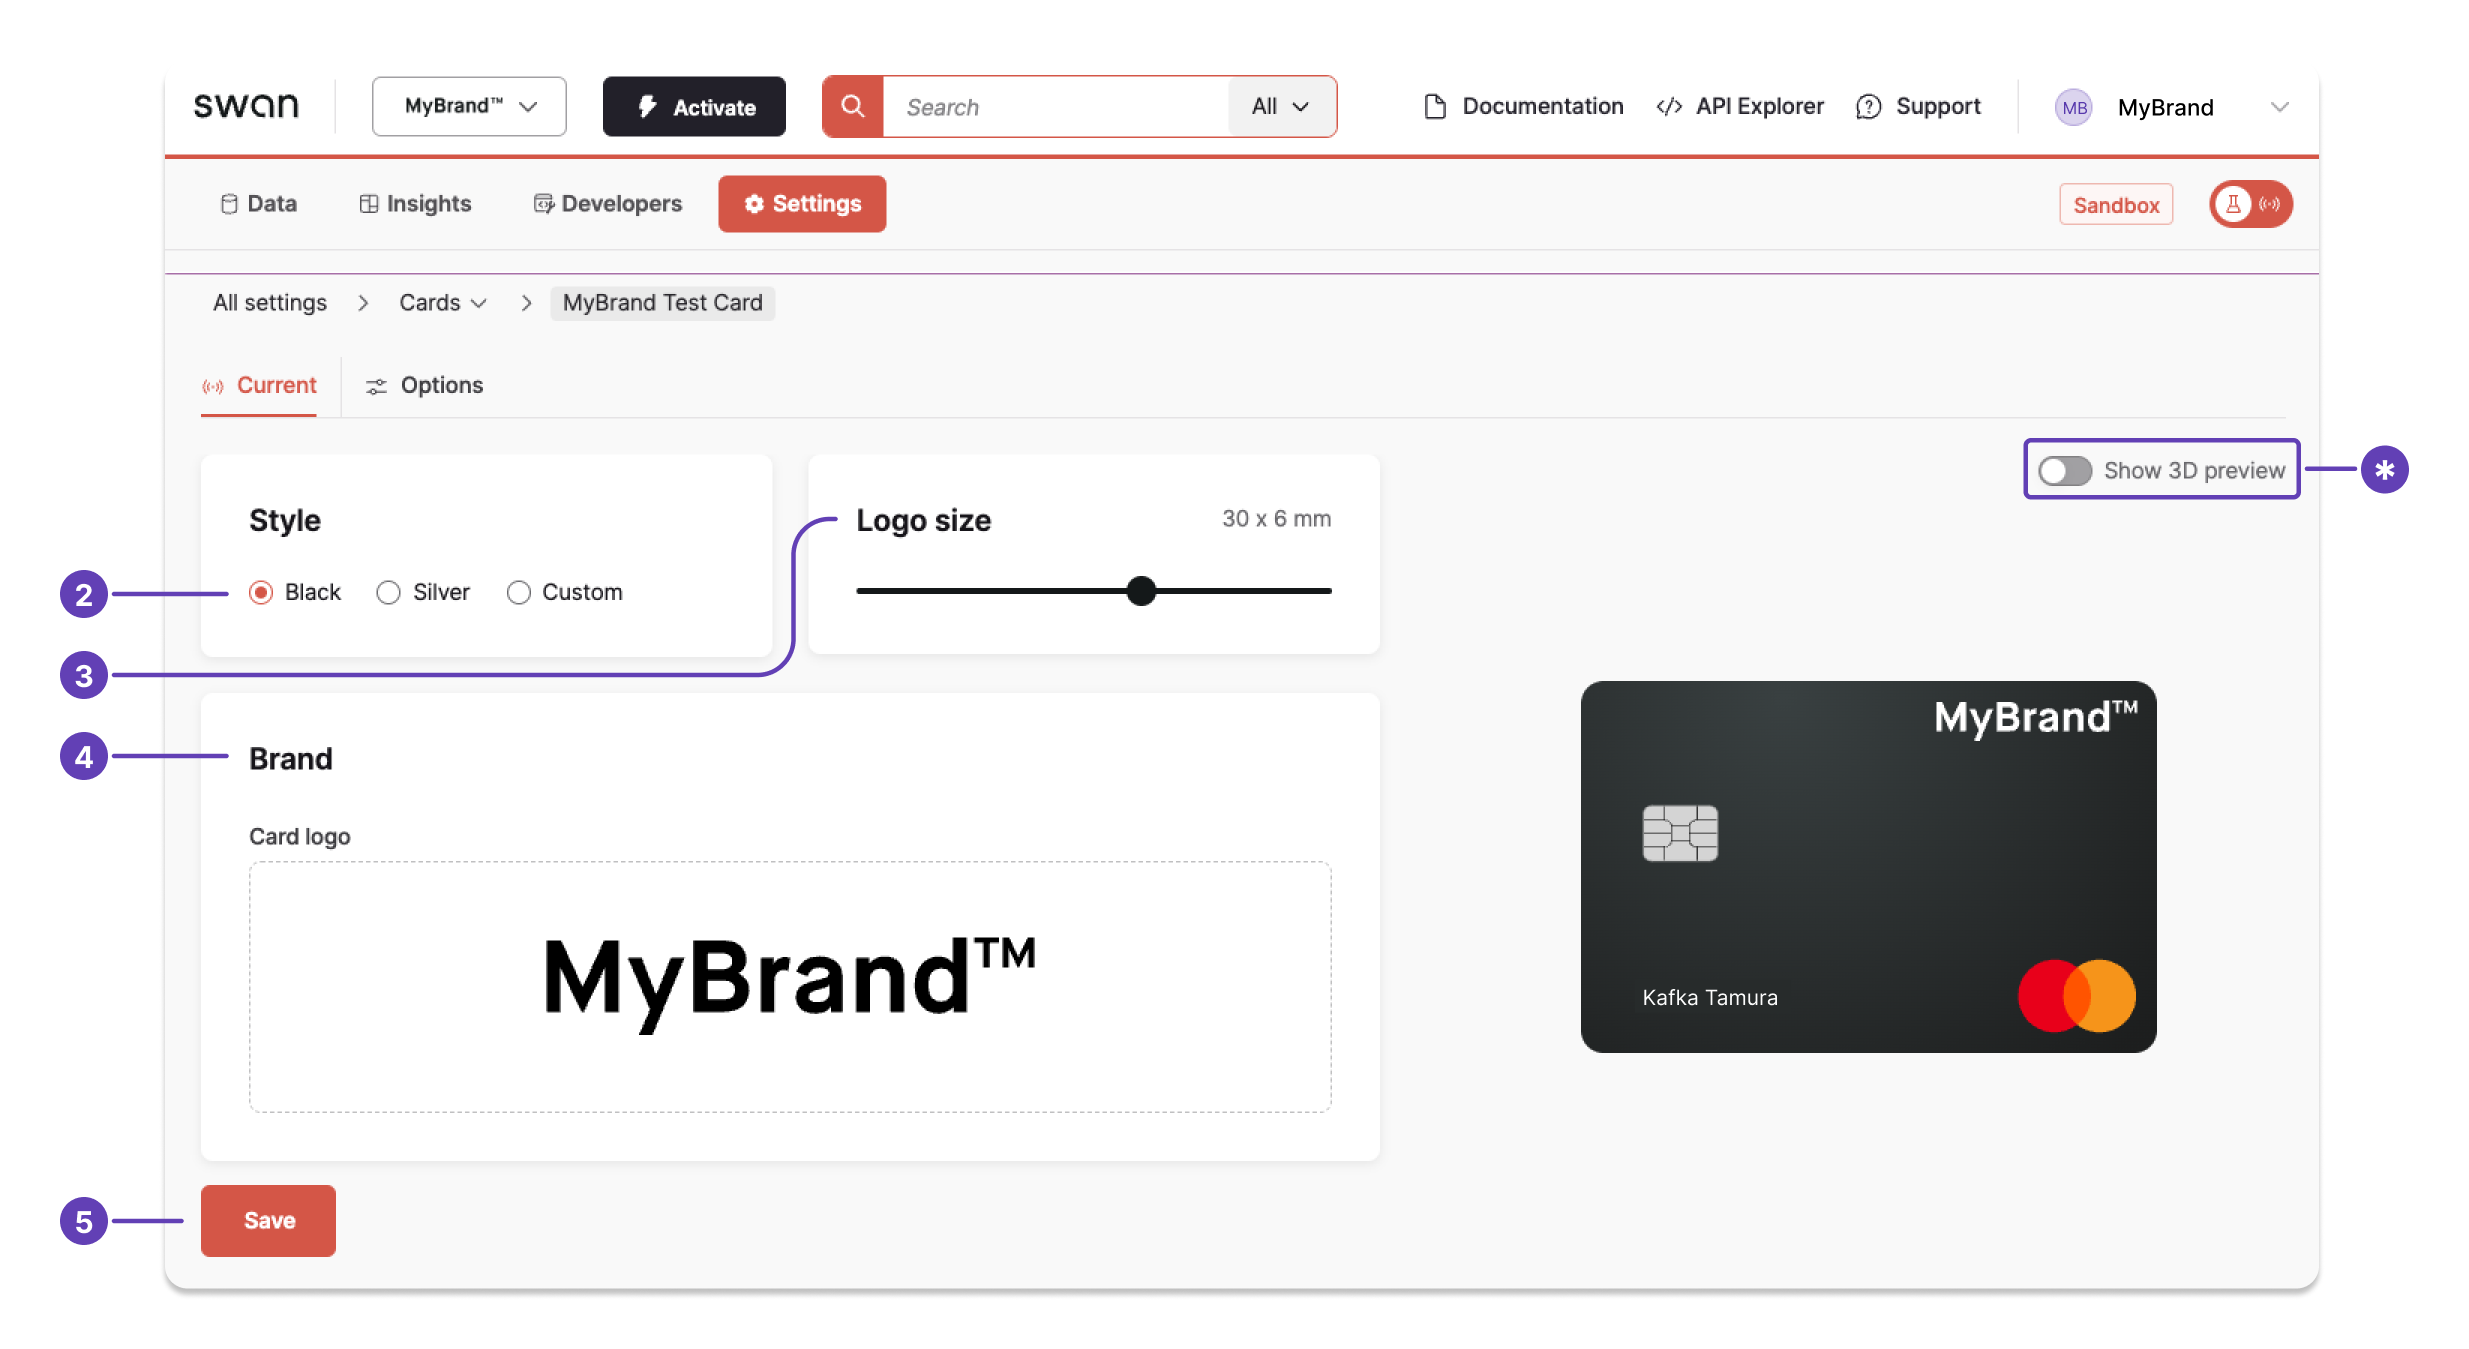
In the Options tab, you can also update your card settings.
Prepare your logo file
Add your logo to standard card designs and for your Swan Dashboard.
Please follow these guidelines to when creating your .svg file, both so your logo looks sharp on your card and so Swan can validate the file.
- The SVG file can be a maximum of 100 kilobytes (KB).
- Use black monochrome.
- Swan will change it to white for standard black cards.
- If you'd prefer other color options, consider designing a custom card.
- Don't use any opacity settings. Don't apply the fill-opacity attribute.
- Don't use any non-vectorial text, meaning no text tag.
- Don't use layering, meaning there should be no overlaid elements.
- The logo edges must fit inside the container, or viewbox attribute.
Here are some tips to make sure your logo meets requirements.
| Problem | Explanation |
|---|---|
| Logo appearing too small | If your logo is appearing smaller than expected, check that your logo fits perfectly in the SVG viewbox attribute. Any padding between your logo and the viewbox edges will appear on your card. |
| Empty rectangle instead of logo | If you see an empty rectangle (black or white) instead of your uploaded logo, there might be an issue with your SVG file. Check that there are no overlaid elements in your file. If there are overlaid elements, remove them and upload the new file. |
| Logo isn't the correct color | If your logo is showing up as black on a black card, or white on a silver card, there might be an issue with your SVG file. Make sure you're not using CSS to apply your color, which is only compatible with browser renderers. |