Step-by-step guide to explore Swan
Step 1: Get access to Swan
Accessing Swan begins on the Swan website.
You'll provide some basic information and then, on a second screen, your mobile phone number. Your mobile phone number is required to gain access to Swan, even if you're just exploring—it's how you'll log in and consent to sensitive operations.
Step 2: Connect with your mobile device
Swan authenticates you, a physical person, to the Swan system with your mobile device and phone number. Developers and end users follow the same process, so everyone logging into Swan must use their mobile device.
Connecting with your device logs you into the Swan Dashboard, the command center for your integration.
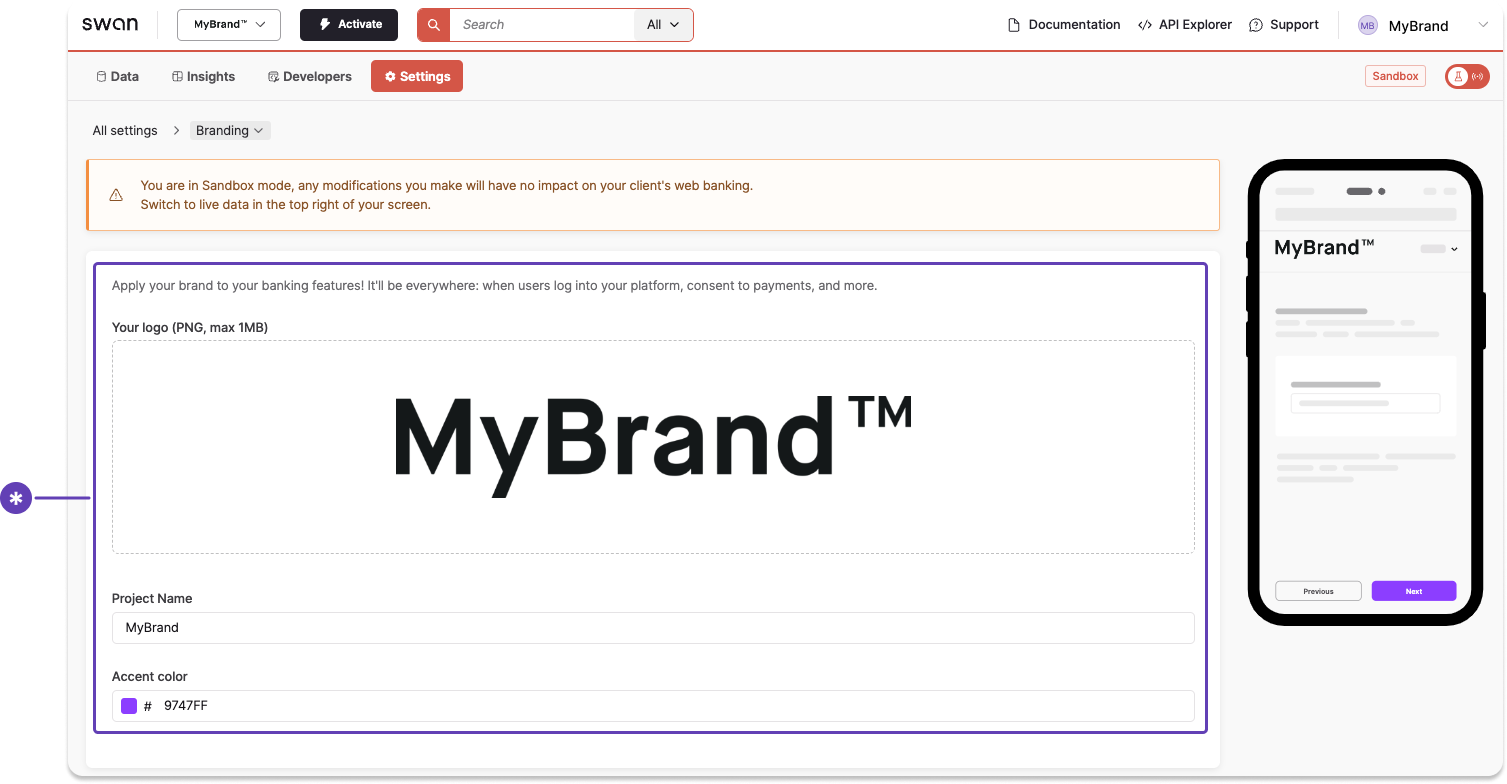
Step 3: Create your project
Build a test banking experience that matches your brand. Open Dashboard > Settings > Branding to name your project, upload your logo, and choose an accent color.
Step 4: Read the docs
- Documentation (you're here): Get to know Swan's features and how to use them.
- Partnership: Learn what it means to Partner with Swan and where Swan operates.
- Developers: Understand Swan's API, why Swan chose Graph QL, available tools, and more.
- API Reference: Review the finite details about all of Swan's mutations, queries, and Graph QL types.
- Support Center: Swan is here to support your end users, too. Check out the Support Center to review the resources available to them.
Step 5: Discover the Sandbox
Start building in Sandbox mode, Swan's testing environment. Have fun—the Sandbox uses fake money. 💸
- Simulate just about everything you can do with Swan in the Sandbox before going live. Playing with your potential integration options in Sandbox helps ensure a successful launch, no matter which integration you choose.
- Invite your coworkers to join so you can build together.
- Create as many Sandbox Users as you'd like to practice setting up accounts, linking IBANs to accounts, completing Sandbox identifications, and more.
Please note that information doesn't transfer between Sandbox and Live.
Step 6: Test the API Explorer
Built for developers, the API Explorer lets you call the API and receive responses to test your build. Unplug Swan's web interfaces to fully customize your banking experience and create your own user experience.
Step 7: Simulate external events
External events not generated by Swan's APIs strongly impact your integration.
Use the Event Simulator and the Testing API to see how well your integration handles these external events. Test receiving a SEPA Credit Transfer or a card payment, verifying a company account holder, and more.
Step 8: Go live
Going live is a multi-step process outlined in the guide to activate your project. Swan Account Managers accompany you as you prepare to launch your integration with Swan.
- If you're not in communication with Swan (yet), please submit this form for more information.
- If you already have dedicated Account Managers, please contact them with any questions.
Happy building!