Postman collection
Postman is a platform for API development and testing. Use Swan's Postman collection with OAuth 2.0 authentication as a sample implementation to help with your integration.
You have a Postman account and you're logged in. You can either use the Postman app or the web version.
Along with this Postman collection, you can use the open source Swan Banking Frontend.
Modify the open source code to provide a web banking app that matches your company's style and your user onboarding flows. The open source project contains the code Swan uses for their banking interface.
Step 1: Download Swan's Postman collection
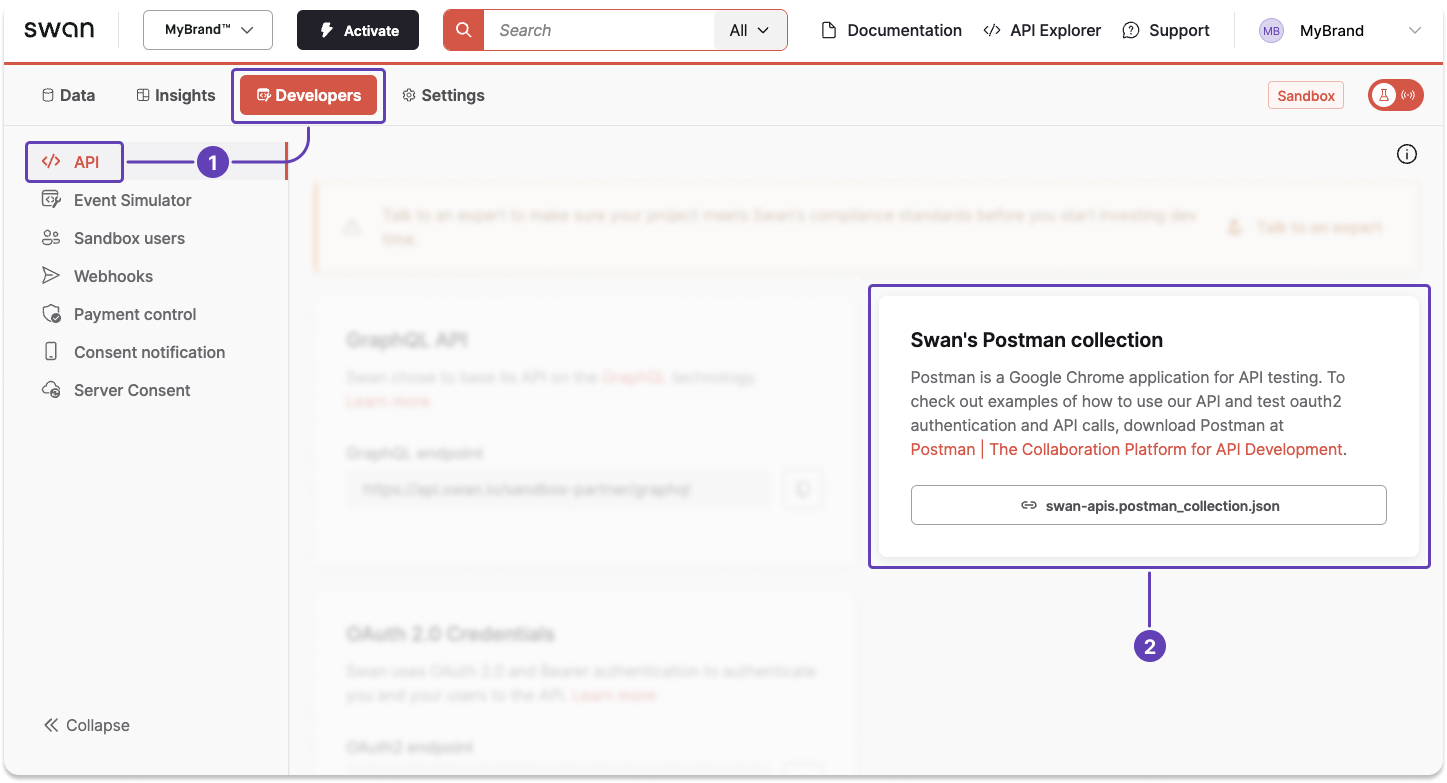
Use Swan's Postman collection to try Swan's APIs and test the authorization flow from Postman before integrating Swan.
- Go to Dashboard > Developers > API.
- Locate the block named Swan's Postman collection and download the collection.
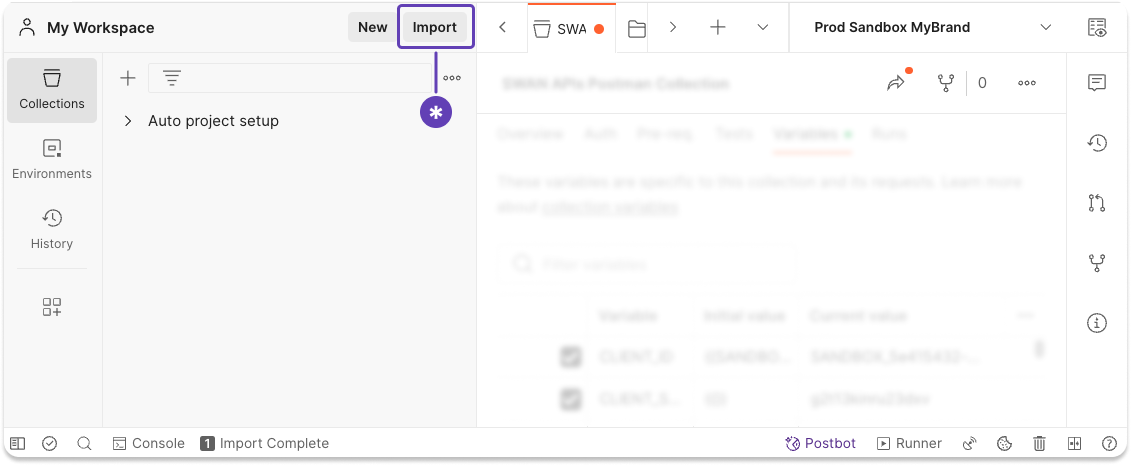
Step 2: Import Swan collection to Postman
In Postman, click Import, then import the file you downloaded from your Dashboard.
Step 3: Get Dashboard information
After you download the collection, configure Postman to communicate with your Swan Dashboard.
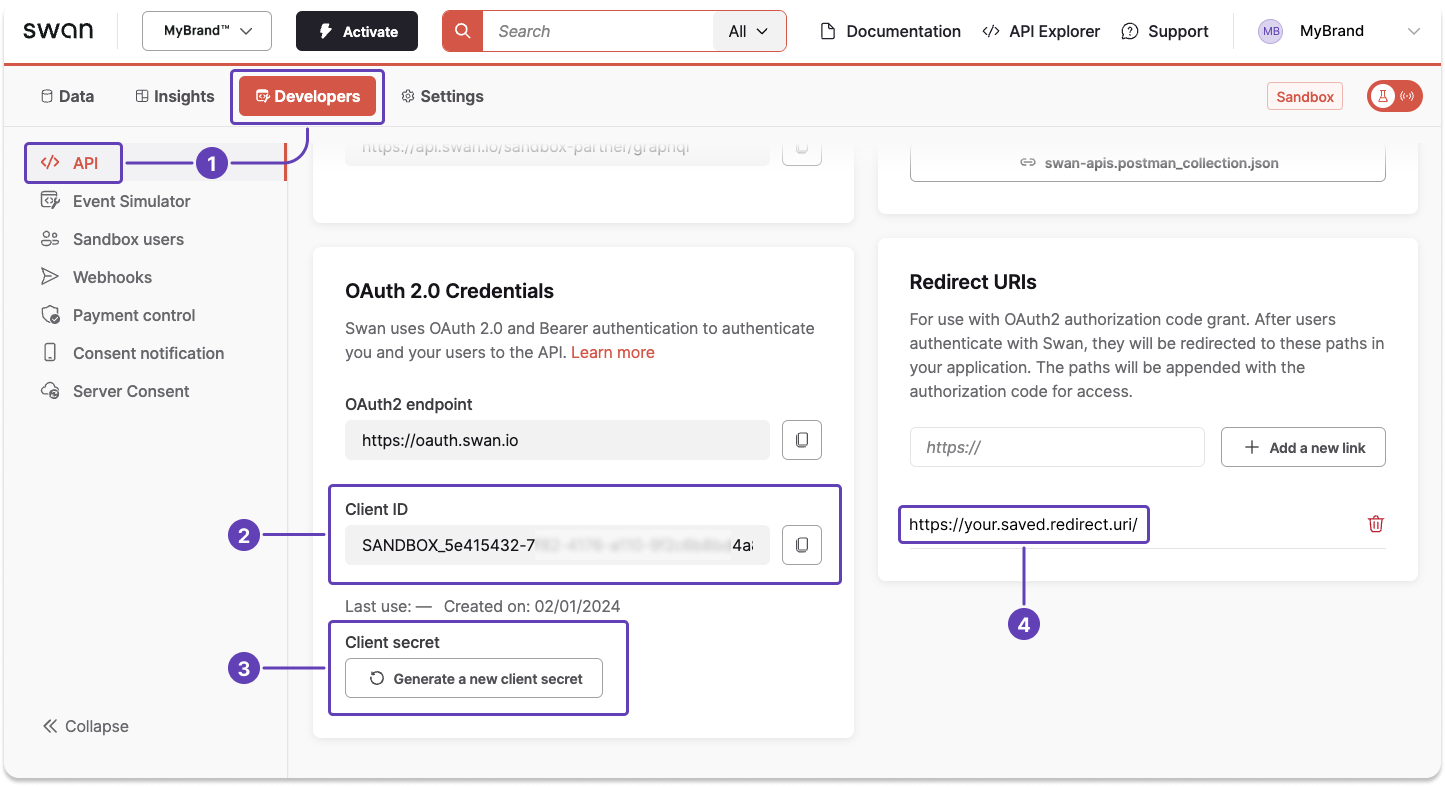
- Go to Dashboard > Developers > API.
- Notice the location of your Client ID in the OAuth 2.0 Credentials block.
- Notice the location of your Client secret in the OAuth 2.0 Credentials block. If needed, generate a new secret.
- Locate your saved redirect URI (Uniform Resource Identifier) in the Redirect URIs block.
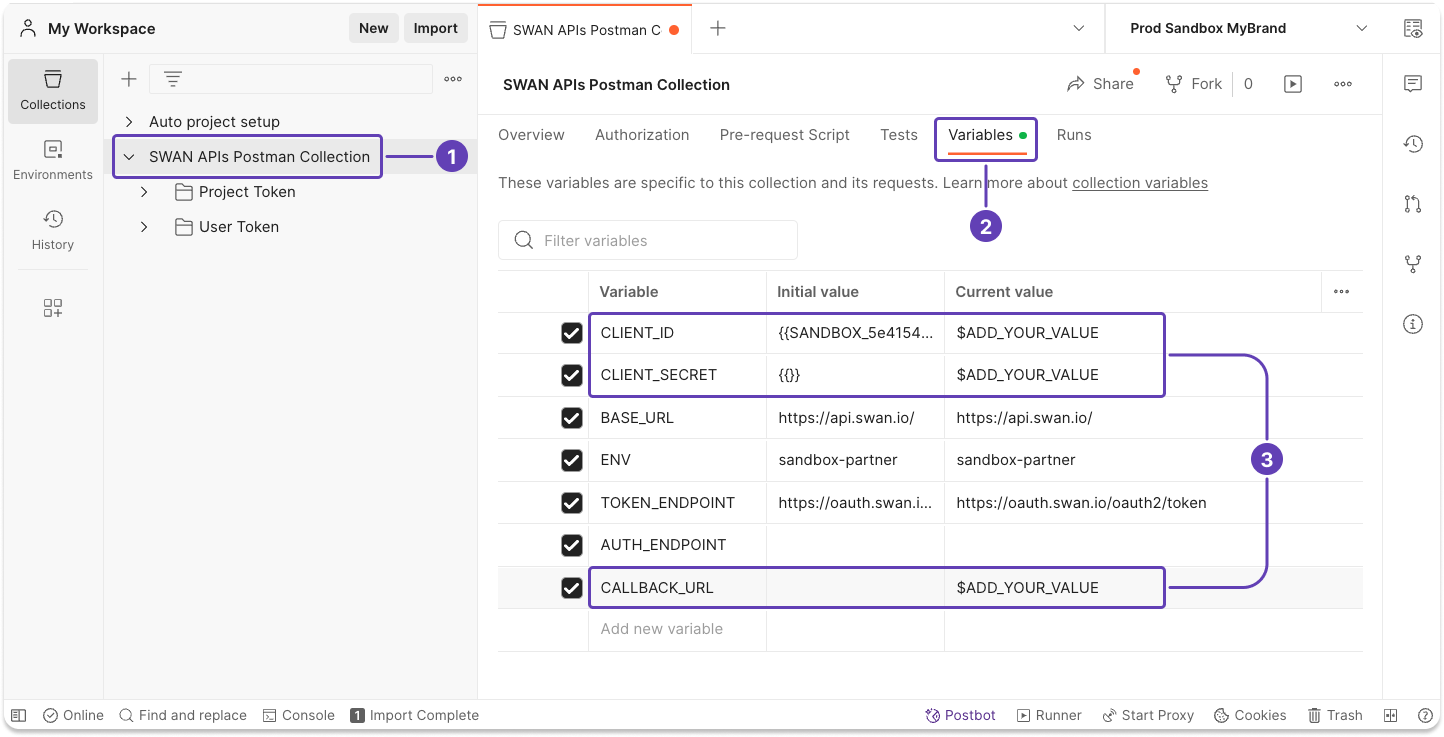
Step 4: Configure Postman
Add the information from your Dashboard to Swan's Postman collection.
- In Postman, open SWAN APIs Postman Collection.
- Go to Variables.
- Add your Dashboard values for
CLIENT_ID,CLIENT_SECRET, andCALLBACK_URL(redirect URI).
Step 5: Get access tokens
5.1 Project access token
- In Postman, open the Project Token folder in SWAN APIs Postman Collection.
- Go to Authorization.
- Scroll to the end of the page, then click Get New Access Token.
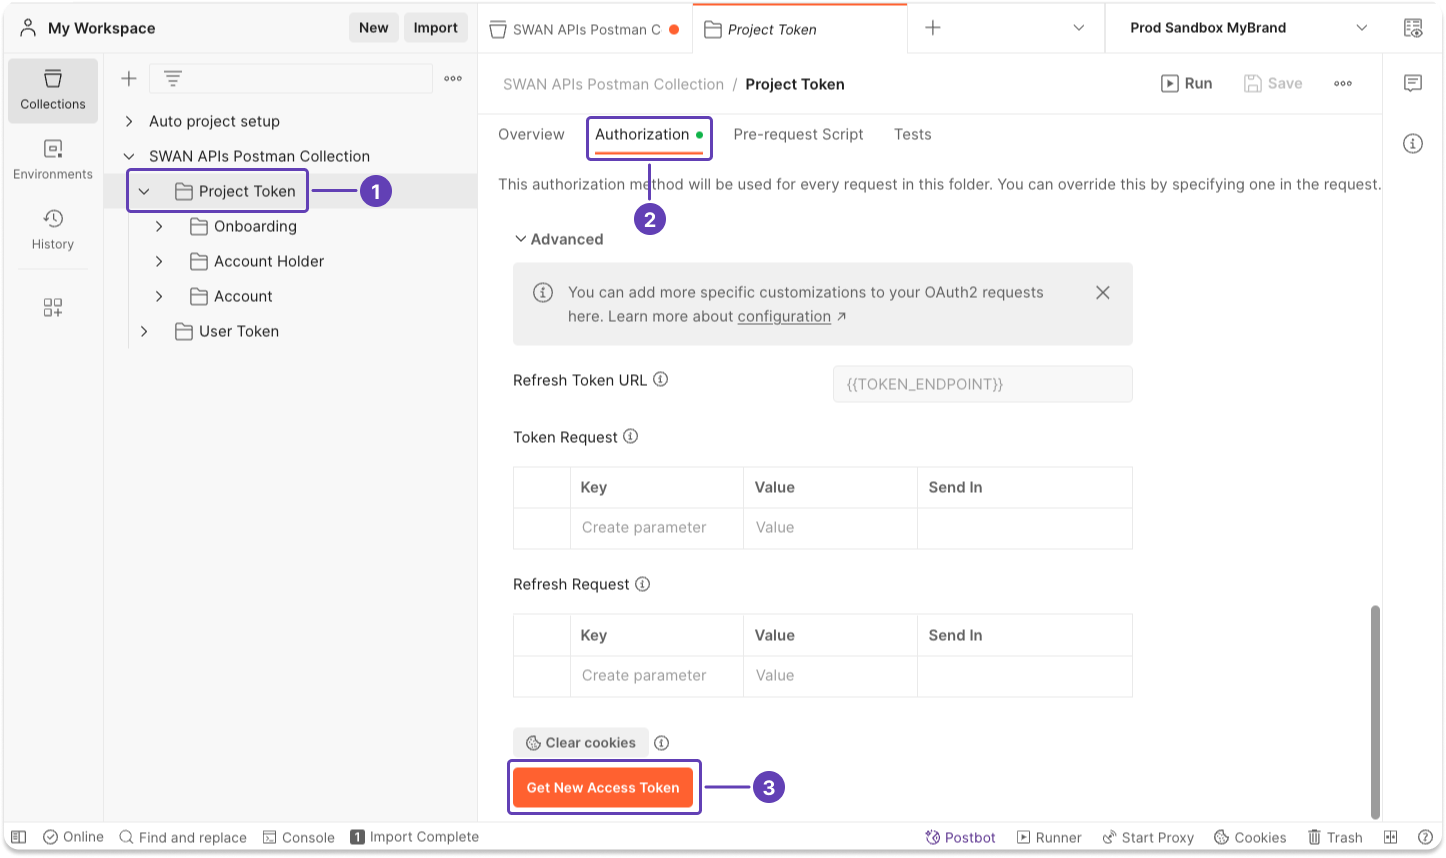
After clicking Get New Access Token, a popup appears briefly. You can cancel authentication if needed.
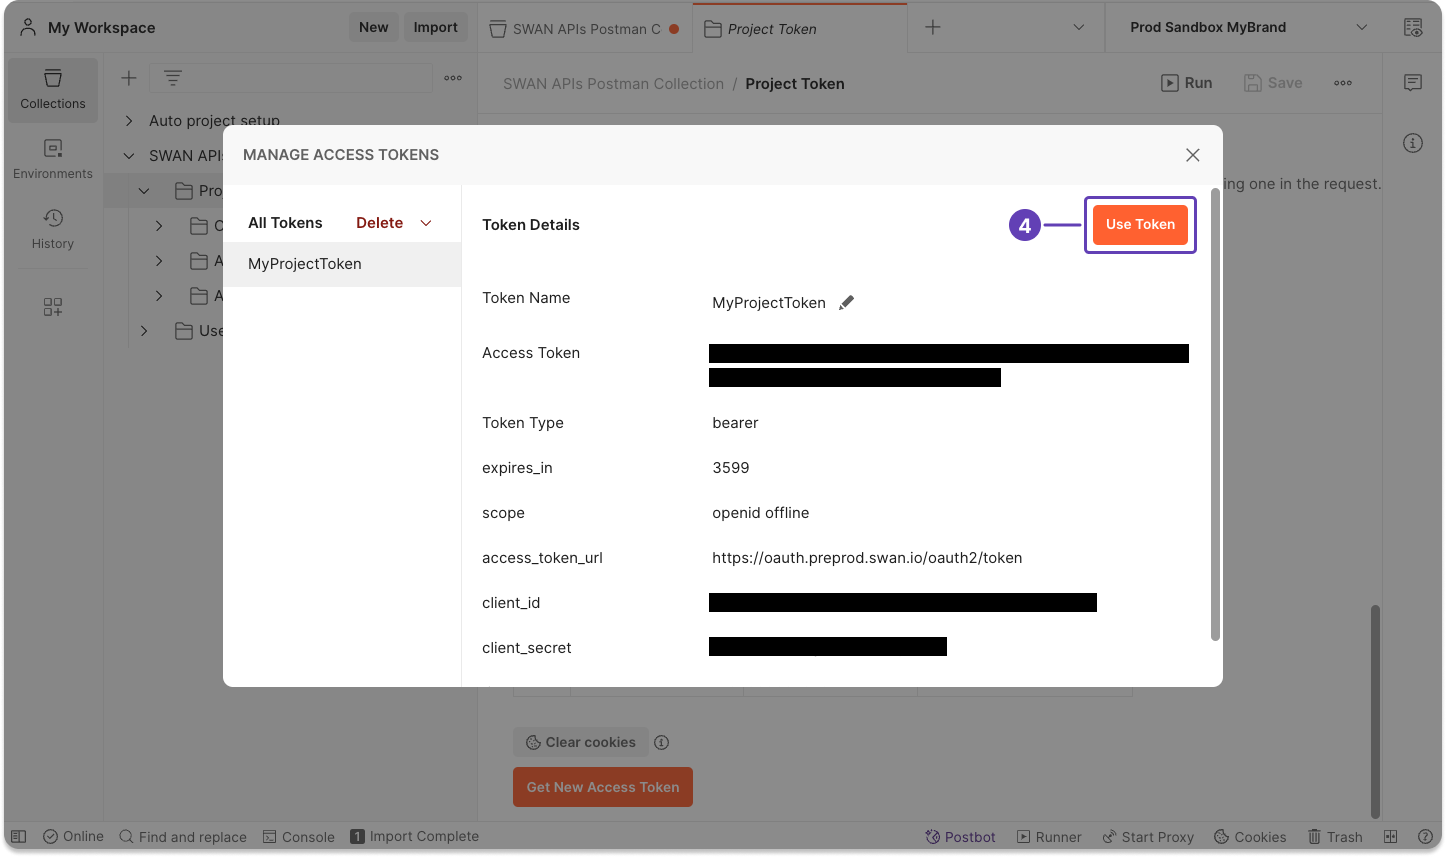
- A modal with all information about your project access token appears on the screen. Click Use Token.
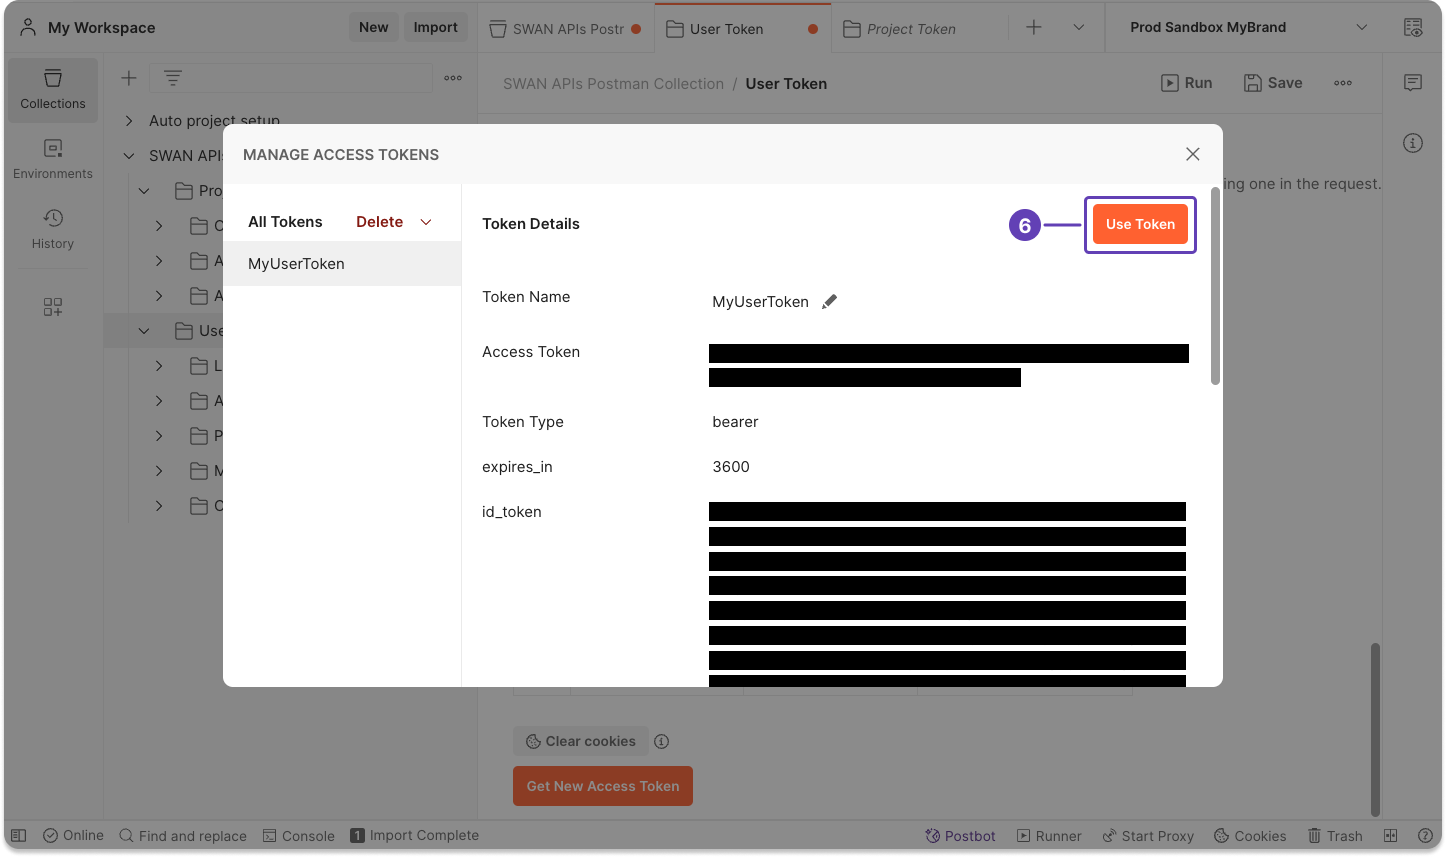
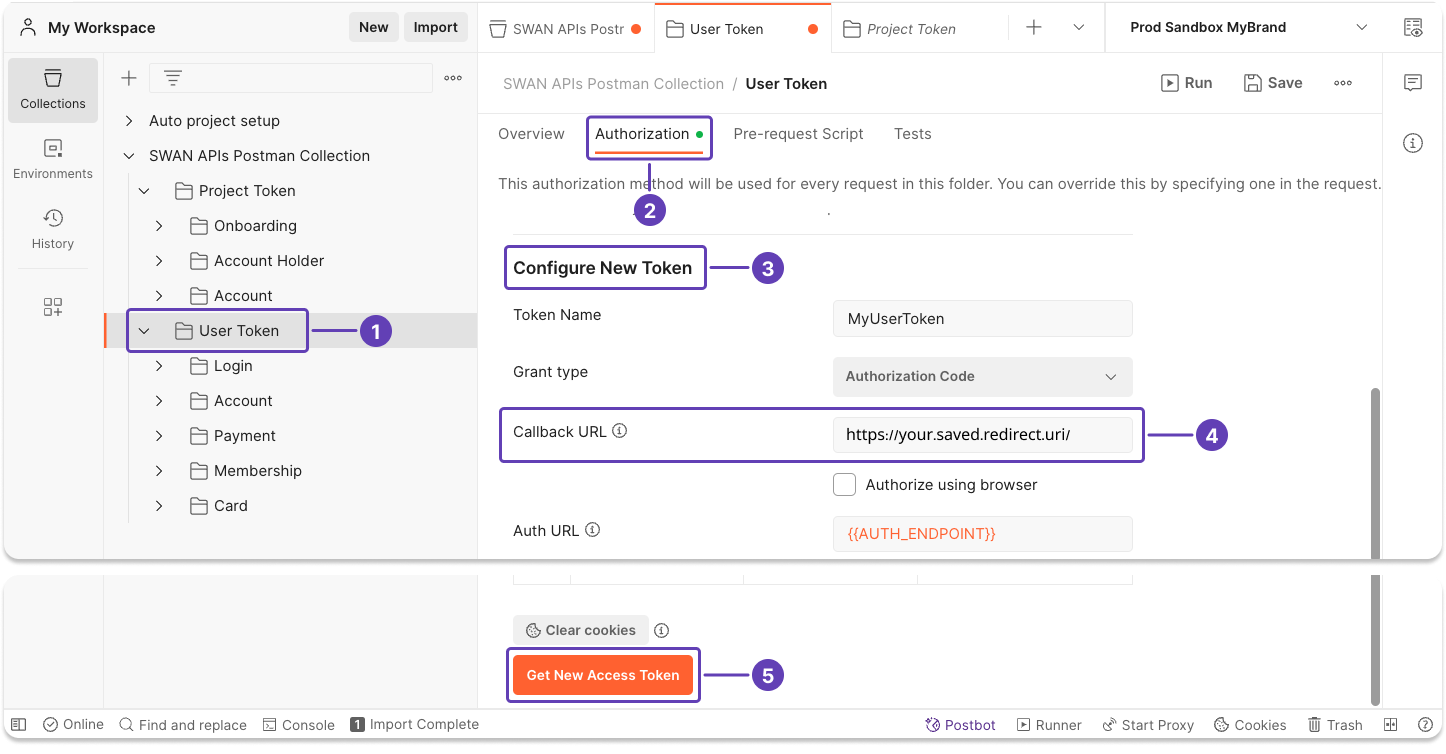
5.2 User access token
Getting a new user access token requires consent from the user associated with the token.
- In Postman, open the User Token folder in SWAN APIs Postman Collection.
- Go to Authorization.
- Locate the section called Configure New Token.
- In Callback URL, enter the redirect URI from your Dashboard.
- Scroll to the end of the page, then click Get New Access Token.
For you to generate a user access token for one of your users, the user must consent.
After clicking Get New Access Token, Swan sends a text message to the mobile number saved for this user. The user needs to use their phone to consent to your user access token before you can continue.
- After the user consents, a modal with all information about your user access token appears on the screen. Click Use Token.