Work with Swan tools
Consider this example that uses several tools to create a new Sandbox user, validate their identity, then receive and return a SEPA Credit Transfer.
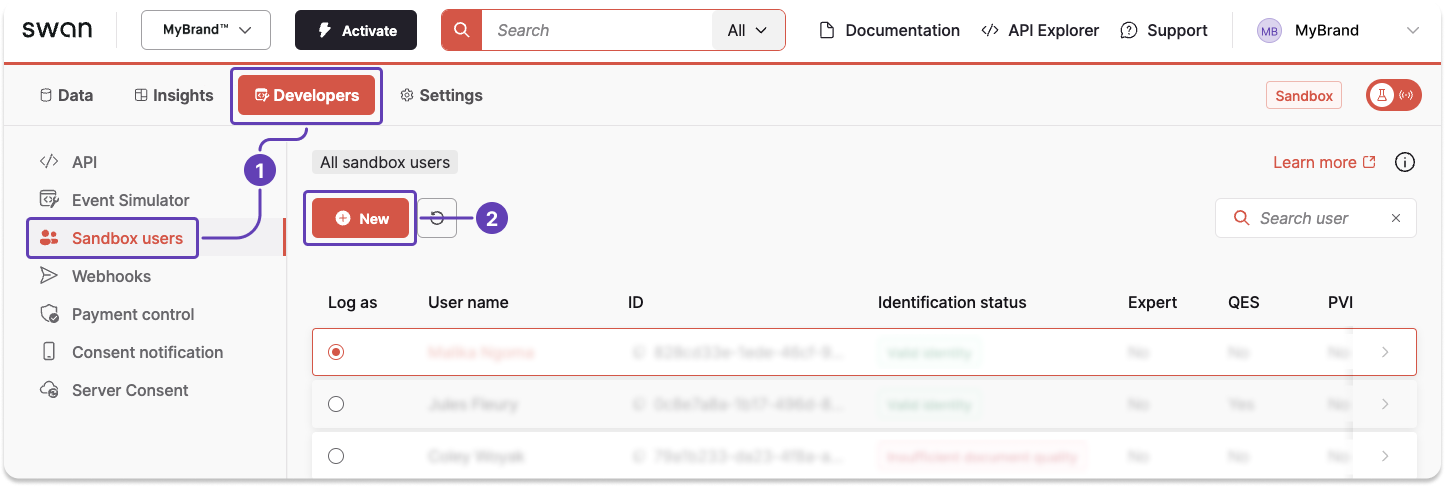
Step 1: Dashboard → Add Sandbox user
This tutorial is for demonstrative purposes; you can also call the createSandboxUser mutation in the Testing API to add a Sandbox user.
- Go to Dashboard > Developers > Sandbox users.
- Click + New to add a new Sandbox user.
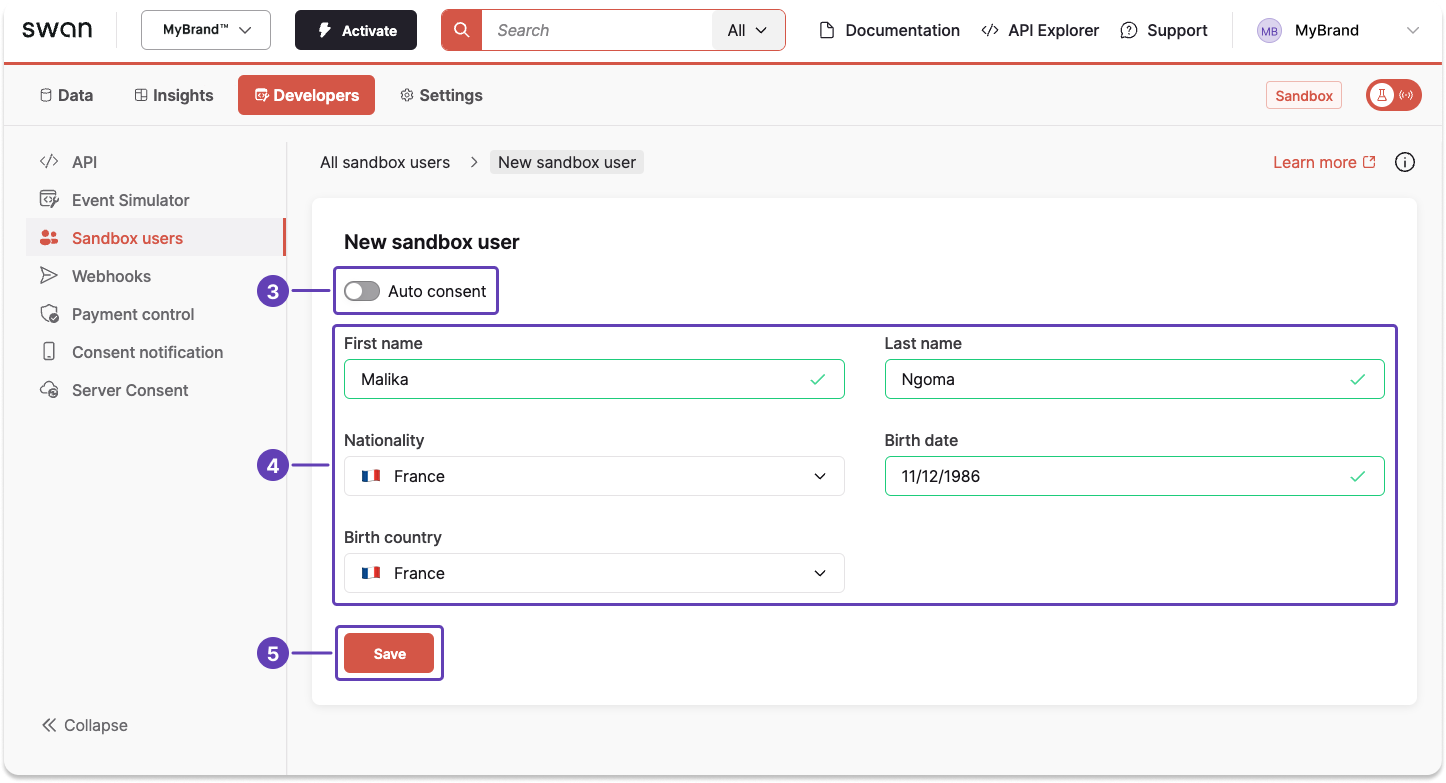
- Choose whether to activate auto consent for your new Sandbox user.
- Enter your Sandbox user's information.
- Click Save.
Step 2: Event Simulator → Validate Sandbox user's identity
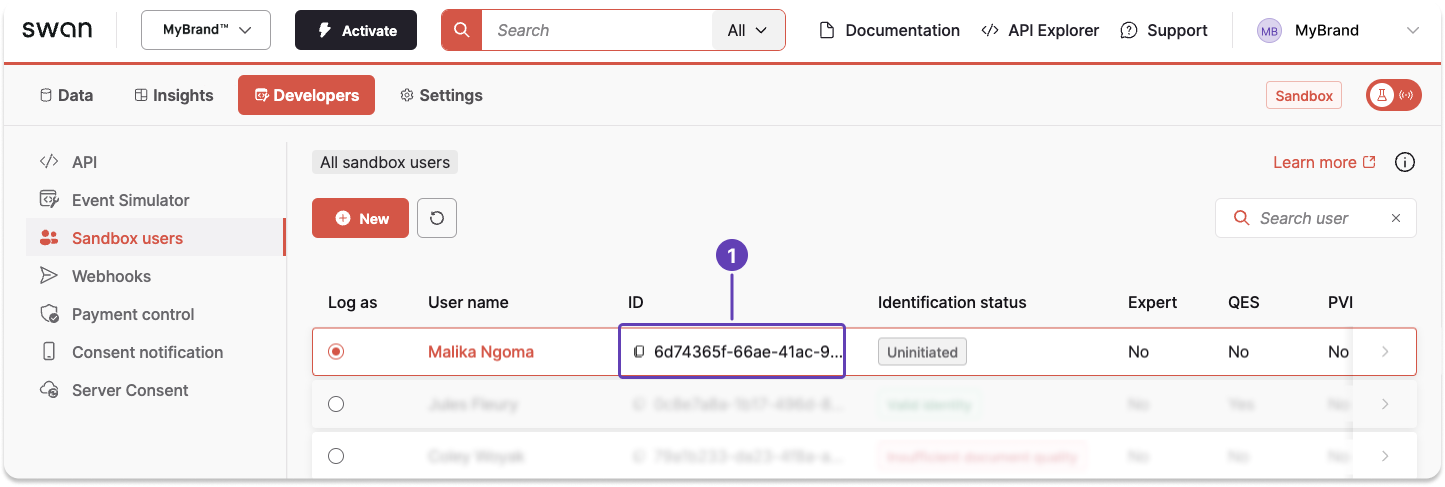
Your new Sandbox user is created with the identification status Uninitiated.
You need to validate their identity before they can perform operations.
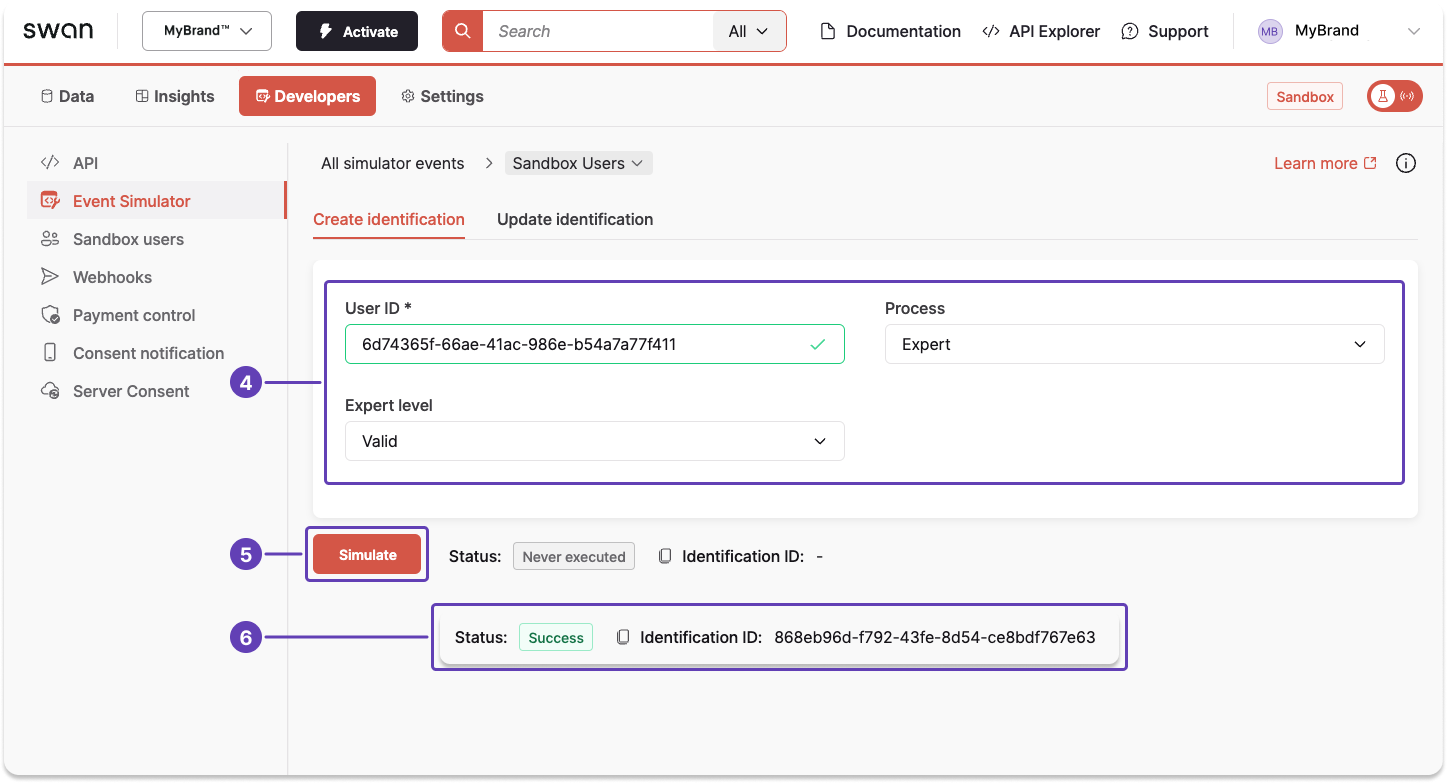
- Click to copy the Sandbox user ID.
- Go to Dashboard > Developers > Event Simulator
- Open Sandbox users.
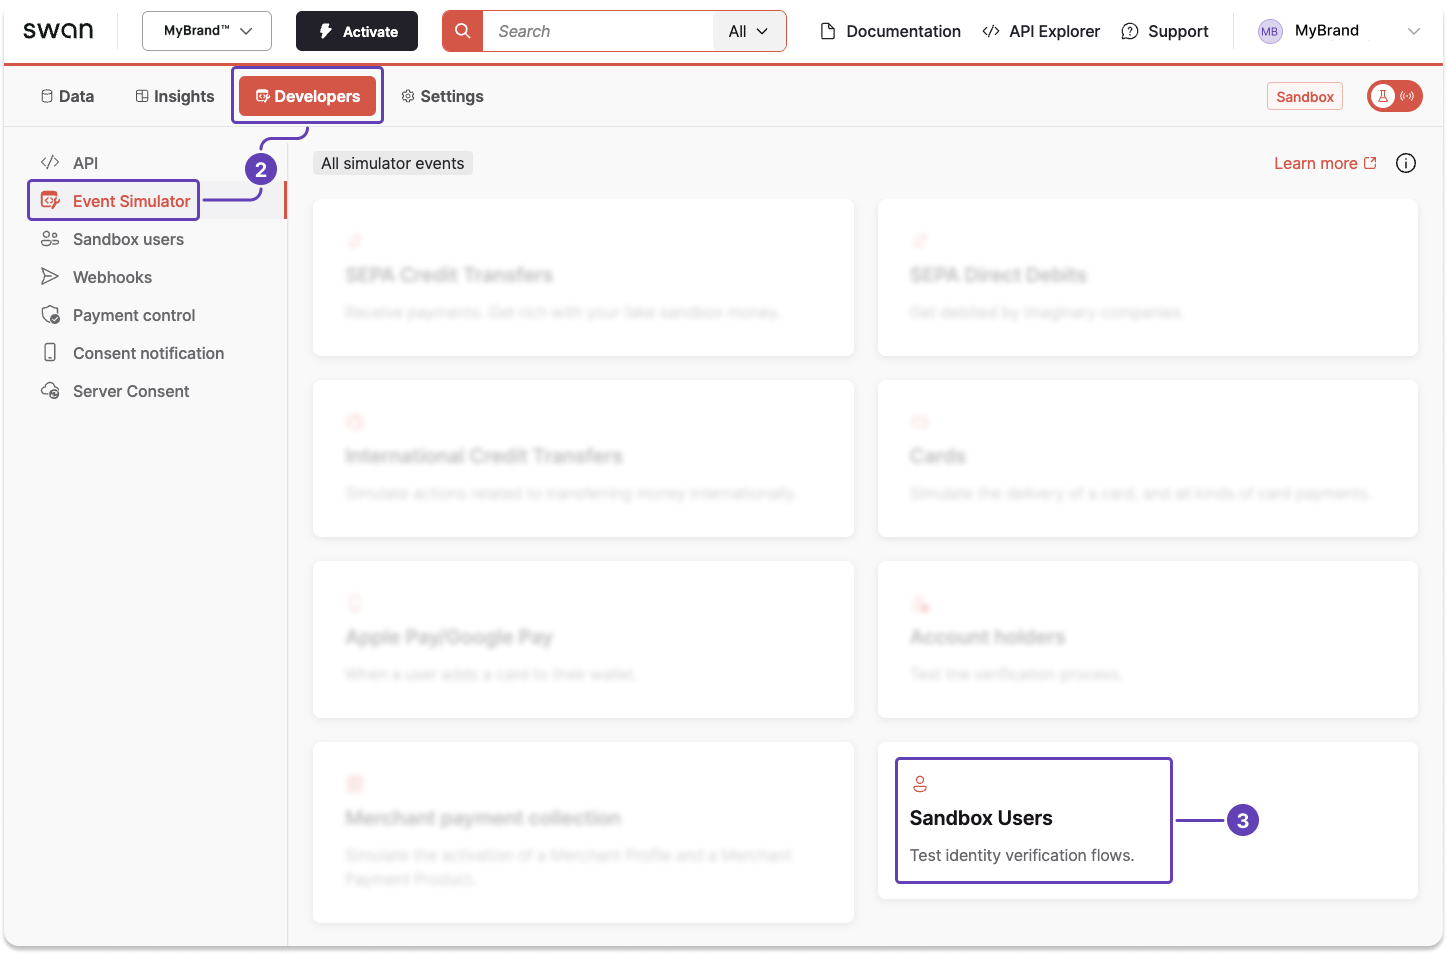
- Enter the Sandbox user ID, choose an identification process, and choose a status for each level you see.
- Click Simulate.
- The status changes to
Successand a new identification ID appears for the Sandbox user.
You can now perform operations with this Sandbox user.
Step 3: Testing API → Simulate receiving a transfer
- Call the
simulateIncomingSepaCreditTransferReceptionmutation to simulate receiving an incoming SEPA Credit Transfer. - Make sure the creditor IBAN belongs to one of your Swan accounts.
- Copy the transaction ID provided in the payload.
Mutation
mutation SimulateReceivingTransfer {
  simulateIncomingSepaCreditTransferReception(
    input: {
      amount: { value: "100", currency: "EUR" }
      creditorIban: "$SWAN_ACCOUNT_IBAN"
      creditorName: "Malika Ngoma"
      debtorIban: "FR2730003000706315734174B93"
      debtorName: "Jules Fleury"
      creditorAddress: {
        addressLine1: "123 avenue de Paris"
        city: "Paris"
        postalCode: "75000"
        country: "FRA"
      }
      debtorAddress: {
        addressLine1: "876 avenue de Toulouse"
        city: "Paris"
        country: "FRA"
        postalCode: "75000"
      }
      endToEndId: "End-to-end reference"
      label: "Label to display"
    }
  ) {
    ... on SimulateIncomingSepaCreditTransferReceptionSuccessPayload {
      transactionId
    }
    ... on ForbiddenRejection {
      message
      __typename
    }
  }
}
Payload
{
  "data": {
    "simulateIncomingSepaCreditTransferReception": {
      "transactionId": "$YOUR_TRANSACTION_ID"
    }
  }
}
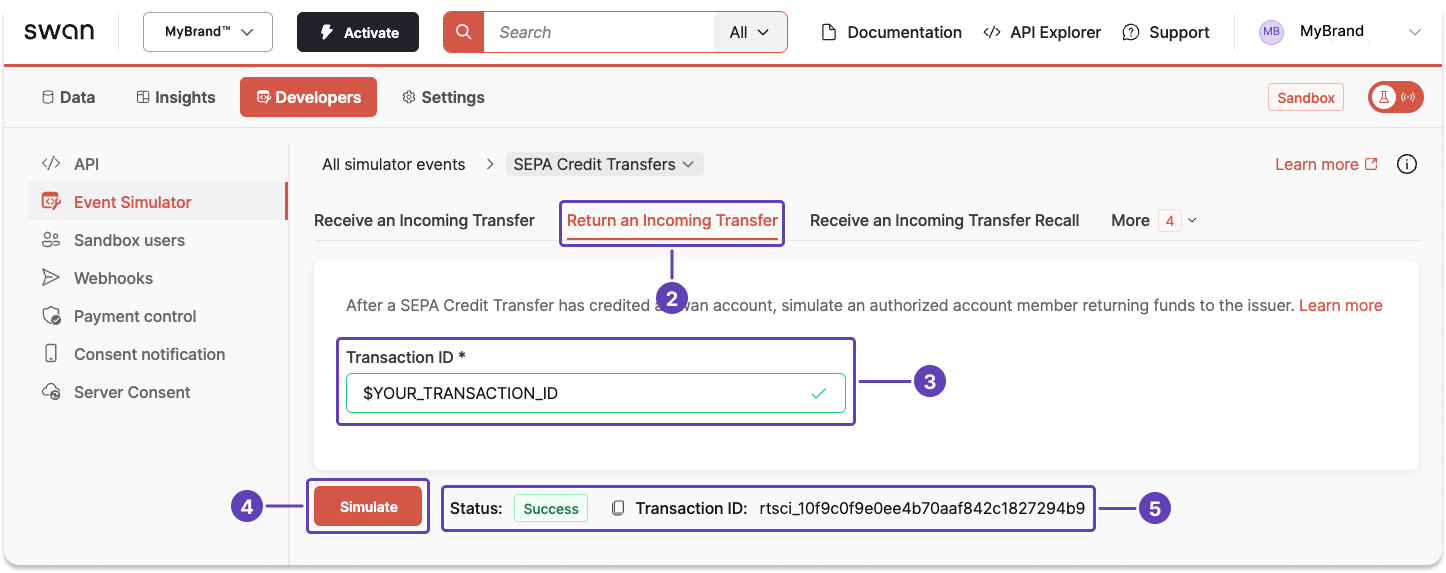
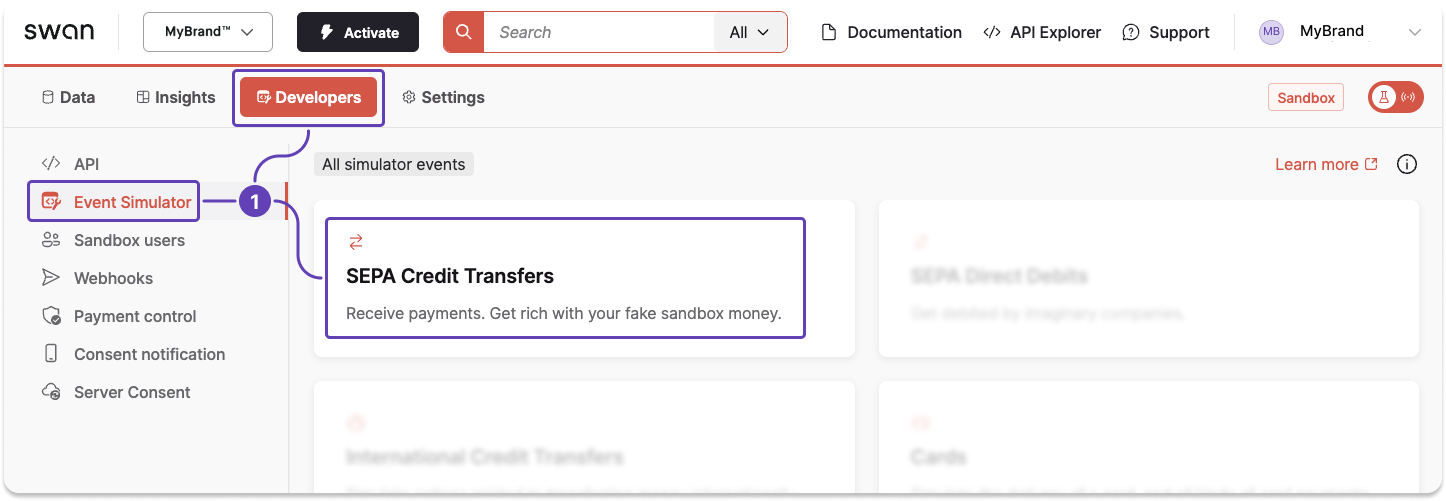
Step 4: Event Simulator → Simulate returning the transfer
- Go to Developers > Event Simulator > SEPA Credit Transfers.
- Open the Return an Incoming Transfer tab.
- Enter the transaction ID collected in step 3.3.
- Click Simulate.
- The status changes to
Successand a new transaction ID appears for the return transaction.